That’s where Spark AR Studio comes in. Think of it as a little playground where you drag, drop, and tweak until your idea turns into an Instagram filter. Now, I’ll walk you through it step by step. But before that, let me say this: if you want to get really good at this stuff, learning some design basics will help a lot. And for that, the UI/UX Graphic Designing course by Uncodemy is one of the smartest moves you can make. It’ll give you the design thinking you’ll end up using every time you build a filter.
Alright, let’s dive in.
Why should you even bother with AR filters?
Good question. Why spend hours making something when Instagram already has a million filters?
Here’s why:
- People love them. Filters get used and shared like crazy. Someone tries your filter, tags a friend, boom it spreads.
- Great for personal branding. Want your page to stand out? A custom filter with your vibe or logo does wonders.
- It’s fun. Seriously. There’s something satisfying about seeing other people use something you created.
- Career edge. If you’re in design, marketing, or content creation, showing you can make AR filters is like flexing a rare skill.
And if you’ve got a design foundation say, you’ve taken that UI/UX Graphic Designing course by Uncodemy then you’re already ahead of the game. Because building filters is not just about sticking things on faces. It’s about designing an experience people enjoy.
What you actually need to start
Don’t overthink this. You don’t need a high-end MacBook Pro or a drawing tablet worth half your salary. Here’s your checklist:
- A computer (Windows or Mac both fine).
- Spark AR Studio (free, just download from Meta’s site).
- Your Instagram account.
- Some images or assets you’d like to use (logos, textures, PNGs).
- Optional: Photoshop, Figma, or Canva if you want to create your own assets.
That’s literally it.
Step 1: Download Spark AR and open it up
Go to the Spark AR site, grab the download, and open it.
You’ll see a bunch of templates like:
- Face Tracker
- Hand Tracker
- World Tracker
Let’s say you pick Face Tracker. Boom you’ve got a digital face staring at you in the preview window. On the left, you’ll see “Camera,” “Face Tracker,” “Face Mesh.” On the bottom, there’s this Patch Editor where you can connect logic blocks (don’t panic it’s more drag-and-drop than coding).
At first glance, it looks like a pilot’s cockpit. But after ten minutes of messing around, you’ll realize it’s actually pretty simple.
Step 2: Think like a designer
This is the part most people skip. They just throw glitter on the screen and call it a day. Don’t be that person.
Before you start, ask: What’s the one idea behind this filter?
- Is it funny?
- Is it stylish?
- Is it interactive?
Less is more. A single clever idea always beats a messy overload of effects.
And here’s where design skills sneak in. Filters are basically mini user experiences. If you’ve studied color balance, layout, or how people interact with visuals—stuff you’d learn in the UI/UX Graphic Designing course by Uncodemy you’ll find your filters feel polished instead of random.
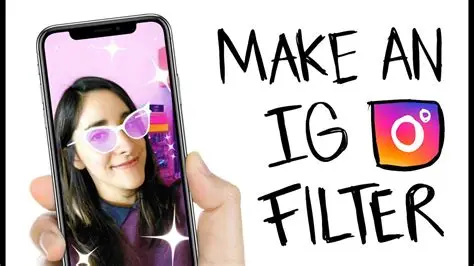
Step 3: Build a simple filter (let’s make glowing glasses)
Alright, let’s make something real. Imagine glowing rainbow glasses that stick to your face.
- Open the Face Tracker template.
- Import a PNG of glasses (transparent background).
- Drop it inside the Face Tracker. Spark AR automatically sticks it to the eyes.
- Resize, rotate, and position until it looks right.
- Want glow? Import a rainbow gradient image.
- Open the Patch Editor → connect your gradient to the glasses texture → use an “Add” blend mode.
- Add a Time node → hook it to color shift → now the glasses pulse with rainbow light.
Try it in the preview. Turn your head. Tilt. Laugh. The glasses follow you like magic.
Pretty satisfying, right?
Step 4: Test it on your phone
Here’s where people mess up they build filters only on desktop and forget real-world testing.
- Install the Spark AR Player app on your phone.
- Connect your phone or scan the QR code from Spark AR Studio.
- Try the filter in bright light, dark light, sideways angles.
Sometimes it’ll look perfect on desktop but janky on your face. Testing early saves headaches.
Step 5: Optimize for Instagram
Nobody wants to wait five seconds for a filter to load. Keep things light.
- Compress textures (don’t upload giant 4K images).
- If you’re using 3D models, keep the polygon count low.
- Stay under 4MB total size Spark AR will warn you.
Remember: fast and smooth always beats flashy but laggy.
Step 6: Publish your masterpiece
This part feels magical.
- Click Upload in Spark AR.
- Connect your Insta/Facebook account.
- Add a name, category, and keywords.
- Upload an icon and a short demo video (showing the filter in action).
- Submit and wait for approval.
In a day or two, your filter is live for the world to use. That’s a pretty cool feeling.
Step 7: Don’t just make it , promote it
Here’s the mistake most people make: they publish and then just… wait.
If you want people to actually use your filter:
- Post a story of yourself using it.
- Create a little challenge around it.
- Ask friends or influencers to try it.
- Use hashtags so it shows up in discovery.
A filter isn’t just a tool, it’s content. Treat it like one.
Step 8: Take it up a notch
Once you’ve done a basic filter, you’ll get ideas for cooler stuff:
- Tap the screen to change looks.
- Add AR objects that float in your room.
- Make effects react to music.
- Swap backgrounds entirely.
This is where things get addictive. You’re not just making filters you’re experimenting with what’s possible in AR. And again, design principles matter here. If you understand how people interact with visuals and experiences like what you’d learn in the UI/UX Graphic Designing course by Uncodemy, your advanced filters will feel intentional, not gimmicky.
Step 9: Troubleshooting (a.k.a. the frustrating part)
Expect hiccups. Everyone hits them.
- Glasses sliding off? Adjust anchor points.
- Filter lagging? Compress assets.
- Rejected in review? Check for flashing lights, copyrighted content, or offensive stuff.
- Doesn’t look good in low light? Add dynamic lighting or tweak materials.
The trick is patience. Fix one thing at a time.
Step 10: Why this is bigger than just fun
Sure, filters are fun. But there’s more:
- You’re learning AR, which is the future of design.
- You’re building portfolio pieces employers actually notice.
- You’re giving yourself a creative playground.
The skillset overlaps with UI/UX, graphic design, branding, marketing, it’s all connected. That’s why pairing Spark AR practice with something like the UI/UX Graphic Designing course in Noidaby Uncodemy makes so much sense. One builds your hands-on AR skills, the other sharpens the creative thinking that makes those skills shine.
Wrapping it up
Alright, let’s sum this up.
- AR filters on Instagram = huge opportunity.
- Spark AR Studio = your free tool to make them.
- Start small (stickers, glasses) → test → publish → promote.
- Keep them lightweight so people actually use them.
- Think like a designer, not just a tinkerer.
- And if you really want to stand out? Take the UI/UX Graphic Designing course by Uncodemy. It’ll give you the design brainpower that makes filters go from “meh” to “wow.”
So go for it. Download Spark AR. Make something silly. Publish it. Watch people use it. That first moment when you see your filter on someone else’s story—it hits different.
Who knows? Maybe your next little experiment goes viral. And even if it doesn’t, you’ve learned a future-proof skill while having a lot of fun.