1) Start with learning outcomes (not features)
AR is a means, not the goal. Before choosing planes, anchors, or 3D models, define what learners should know or be able to do.
Use the “SOLO taxonomy” or “Bloom’s” verbs to phrase outcomes:
- Remember: “label the parts of a cell”
- Understand: “explain photosynthesis with cause–effect”
- Apply: “assemble a circuit that lights an LED”
- Analyze: “compare volcanic rock textures”
- Create: “design a bridge and test load limits in AR”
- Evaluate: “critique a peer’s 3D prototype”
Design rule: If your outcome can be met as well with a 2D video or worksheet, AR might be unnecessary. Use AR when spatial understanding, embodied interaction, or contextual overlay genuinely improves learning.
2) Choose the right AR modality
Pick the interaction style that best serves the outcome:
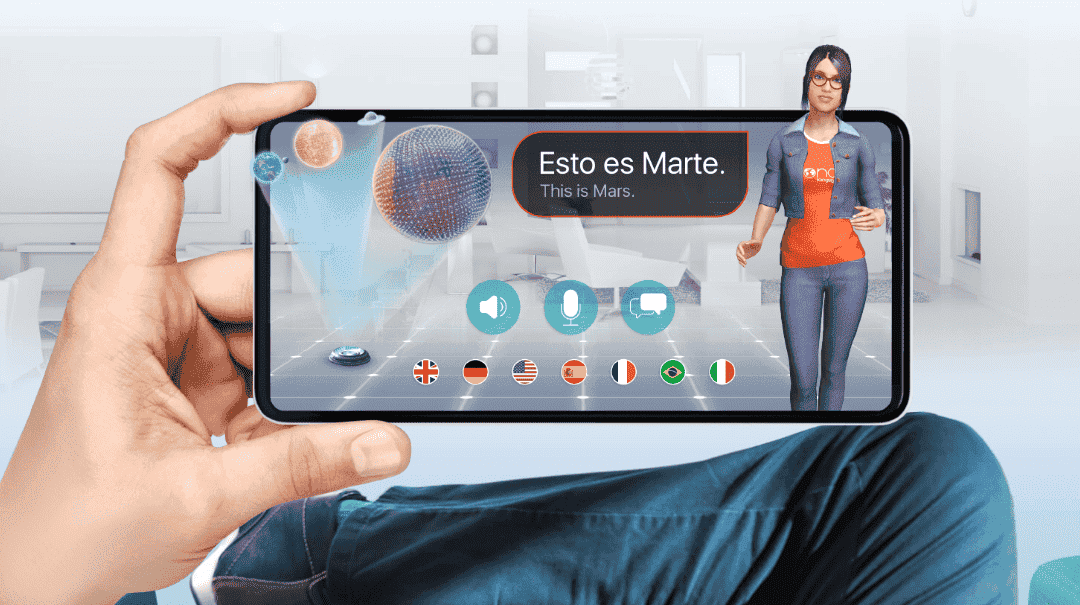
- Image targets / marker-based: Point the camera at a textbook image to launch a 3D explainer. Great for triggered micro-lessons.
-
- Plane detection / world-anchored: Place a virtual heart model on a desk; walk around it to see structures. Ideal for spatial exploration.
-
- Location-based: Campus scavenger hunts; geology fieldwork overlays. Perfect for situated learning.
-
- Body/face tracking: Pronunciation aids showing tongue placement; PPE fitting training. Useful for procedural and kinesthetic tasks.
-
- Object recognition: Point at a real artefact to reveal labels or maintenance steps. Good for workplace learning.
-
- WebAR: Quick access via browser (no app install), excellent for lightweight activities.
Heuristic: The more constrained the environment (classroom, desk), the easier your tracking and UX.
3) Pick a stack that matches your scope and team
Cross-platform engines
- Unity + AR Foundation (wraps ARKit/ARCore): Most popular for edu AR; huge ecosystem; C# scripting.
-
- Unreal Engine: High-fidelity visuals; steeper learning curve.
Native
- ARKit (iOS) and ARCore (Android): Best performance, but two codebases.
Web
- WebXR / Three.js / A-Frame or 8th Wall: No install; great for pilots, quick distribution, and low IT friction.
Content
- 3D: Blender, Maya, Sketchfab libraries.
- Pipelines: GLTF/GLB (preferred), animations with USDZ (iOS), LODs for performance.
Relevant Uncodemy courses: Full Stack Development, Python Programming, Data Science & Machine Learning, UI/UX Design. If you’re going Unity-first, look for AR/VR Development with Unity (or equivalents) within Uncodemy’s ecosystem.
4) Instructional design blueprint (template)
Lesson brief (1 page)
- Grade level & subject
- Outcomes (3–5, measurable)
- Prerequisites
- AR modality: (image-target / plane / location / WebAR)
- Hardware: BYOD phones? School iPads?
- Class duration: 15-, 30-, 45-minute options
- Assessment: quick checks, rubric
- Accessibility plan: captions, color-blind safe, device fallback
Activity flow (example: Human Heart 30-min)
1. Hook (3 min): Quick 2D video or question.
2. Explore in AR (12 min): Place 3D heart; tap hotspots; watch micro-animations of valves.
3. Guided practice (8 min): Label parts; answer in-app quiz; rotate to locate murmurs.
4. Reflect (5 min): Exit ticket; “What confused you?” voice note.
5. Extend (homework): Short WebAR “Show your parents” exploration link.
5) UX patterns that work in classrooms
- Zero to content in ≤15 seconds: open → scan surface → place → learn. Avoid long tutorials.
- Big, glove-friendly controls: 44–48 px touch targets.
- One primary action per screen: learn → act → confirm. Reduce cognitive load.
- On-object affordances: glowing hotspots, minimal UI chrome.
- Reset & recenter always visible: classrooms are crowded; tracking gets lost.
- Offline-tolerant: cache models; degrade gracefully.
- Shared device flow: 1 device per 2–3 students; build turn-taking prompts (“Pass to teammate to label atrium”).
Accessibility
- Voiceover labels for hotspots
- Captions for narration
- High-contrast toggle
- One-tap “AR → 3D model on screen” fallback for students with motion discomfort or unsupported devices
-
6) Minimal technical architecture
Client (AR app)
- Scene loader & content manager
- Tracking (planes/markers/objects)
- Interaction system (tap, drag, scale, orbit)
- Assessment micro-services (local state, offline queue)
- Analytics event queue (privacy-aware)
Backend (optional for v1)
- Content CDN (GLB/USDZ, textures)
- User progress & assessment (if accounts)
- Analytics ingestion (consent-gated: events, no raw video)
Data & privacy
- Do not collect faces, raw camera frames, precise geo unless essential.
- Comply with COPPA/GDPR where applicable.
- Parental consent flows for under-13, anonymized telemetry, data retention policy.
7) Performance & device constraints
- Target 30–60 FPS on mid-tier phones.
- Keep draw calls low; use LOD and texture atlases.
- Cap model polycount: e.g., a detailed organ ≈ 50–150k tris, split by parts.
- Preload lightly; stream heavier assets after placement.
- Disable shadows on low-end; use baked lighting and AO maps.
8) A tiny starter: Unity + AR Foundation (image tracking)
// Attach to an ARTrackedImageManager GameObject
Copy Code
using UnityEngine;

using UnityEngine.XR.ARFoundation;

public class TrackedImageSpawner : MonoBehaviour

{

    public ARTrackedImageManager imageManager;

    public GameObject heartPrefab; // assign GLB/FBX-converted prefab

    void OnEnable() => imageManager.trackedImagesChanged += OnChanged;

    void OnDisable() => imageManager.trackedImagesChanged -= OnChanged;

    void OnChanged(ARTrackedImagesChangedEventArgs args)

    {

        foreach (var added in args.added)

        {

            var go = Instantiate(heartPrefab, added.transform);

            go.name = "HeartModel";

        }

        foreach (var updated in args.updated)

        {

            var model = updated.transform.Find("HeartModel");

            if (model != null)

                model.gameObject.SetActive(updated.trackingState == UnityEngine.XR.ARSubsystems.TrackingState.Tracking);

        }

        foreach (var removed in args.removed)

        {

            var model = removed.transform.Find("HeartModel");

            if (model != null) Destroy(model.gameObject);

        }

    }

}
Why start here? Image tracking is reliable in class (printed pages or textbook figures) and avoids plane-finding confusion.
9) Content pipeline that won’t melt your team
1. Storyboard each concept (3–6 panels: intro → interaction → check).
2. Modeling: build or source GLB/USDZ; add materials; bake AO; LODs.
3. Pedagogical script: 60–120-second micro-narration per object.
4. Voice & captions: record, auto-caption, review.
5. Assembly: import into engine, attach hotspots, link assessment.
6. Review loop: teacher review (accuracy), student pilot (usability), QA (performance).
7. Packaging: per-lesson bundles; CDN hosting; versioning.
8. Analytics: define events (placed_model, opened_hotspot, correct_label, time_on_task).
Tip: Maintain a content schema (JSON) for each lesson: IDs, hotspot coords, labels, quiz banks. This lets you update content without code changes.
10) Assessment: build learning proof into the interaction
Mix formative and summative:
- Hotspot Q&A: “Tap the aorta.” (Immediate feedback with micro-animation.)
- Labeling drag-and-drop in AR space.
- Sequencing: arrange mitosis phases around the model.
- Performance tasks: “Assemble a simple circuit to light the LED.” Validate via state detection.
- Reflection: one prompt + audio note (30–60 sec).
Rubric (quick)
- Accuracy (0–2): labels correct, steps in order
- Reasoning (0–2): can explain why
- Transfer (0–2): applies concept in a variant task
- Collaboration (0–2): shared-device roles followed
- Metacognition (0–2): articulates confusion/resolution
11) Classroom deployment playbook
- Device audit: list OS versions; pre-install app if native; prefer WebAR for pilots.
- Space plan: clear a table “AR zone”; mark with tape to reduce occlusion collisions.
- Teacher prep: 10-min micro-PD; printed quick start; QR codes for targets.
- Student roles: navigator (device), explainer (reads prompts), recorder (notes/photos).
- Plan B: 3D non-AR fallback + teacher screen mirroring for demos.
12) Monetization & sustainability (if productizing)
- Schools: per-seat or site license; LMS integrations (Google Classroom, Canvas).
- Freemium: 2–3 free lessons → full library subscription.
- Content partnerships: textbook publishers; museums; STEM kits.
Key metrics
- Time on task (median)
- % objectives completed per lesson
- Quiz delta (pre/post)
- Return rate across lessons
- Teacher NPS & student satisfaction
13) Common pitfalls (and fixes)
- Over-novelty: AR is cool, but don’t confuse students.
Fix: one clear learning goal per scene, 5–7 hotspots max.
- Jitter & drift: tracking breaks near blank surfaces.
Fix: rich-texture mats or image targets; provide recenter button.
- Too heavy models: lag on mid-range phones.
Fix: aggressive LODs; compress textures; limit real-time lights.
- No accessibility: students left out.
Fix: captions, narration transcript, color-safe palette, 3D fallback.
- IT blockers: installs, permissions.
Fix: WebAR pilots; offline caching; MDM distribution.
14) Sample project roadmap (8 weeks)
- Week 1: outcomes, storyboard, tech choice, device audit
- Week 2: prototype modality (image tracking vs plane)
- Week 3–4: content production (models, narration, captions)
- Week 5: integrate hotspots, assessments, analytics events
- Week 6: classroom pilot (10–15 students), collect feedback
- Week 7: performance tuning, accessibility, polish
- Week 8: teacher guides, packaging, rollout
15) Quick checklist (copy/paste)
- Outcomes measurable and AR-worthy
- Right modality chosen (image/plane/location/web)
- 30–60 fps on target devices
- Reset/recenter & offline cache
- Captions, VO, color-safe, 3D fallback
- Assessment embedded (labels/sequence/reflection)
- Privacy policy + data minimization
- Teacher quick start + Plan B
- Analytics events defined
- Pilot tested with real students
Where Uncodemy fits in
- UI/UX Design: for interaction flows, accessibility, and classroom-friendly design.
- Full Stack Development: to build your CMS, analytics, and deployment backend.
- Python Programming: scripting pipelines, content tooling, lightweight backends.
- Data Science & Machine Learning: analytics dashboards, adaptive difficulty, personalization.
- Artificial Intelligence: natural-language help inside AR (voice Q&A, hints), object recognition for hands-on subjects.
If you’re assembling a team or upskilling solo, these course tracks align directly with AR edu builds.
Final thought
Designing AR for education isn’t about dazzling effects—it’s about clarity, transfer, and inclusion. Start from outcomes, choose the simplest modality that achieves them, and validate with real students early. Keep performance, privacy, and accessibility non-negotiable, and you’ll ship AR experiences that actually elevate learning.