






Software testing project · Beginner · 2–3 days
AI API Test Generator from Swagger / OpenAPI — Project with Source Code
Paste a Swagger / OpenAPI spec and get positive, negative and boundary API tests in Jest, Pytest or Postman in seconds.
- HTML5
- CSS3 (Grid, Flexbox, variables)
- Vanilla JavaScript (ES6+)
- js-yaml
- OpenAPI 3.x / Swagger 2.0
- Jest + Supertest
- Pytest + requests
- Postman Collection v2.1
- 18
- chapters in the guide
- 08
- steps to run it
- 18
- files in the ZIP
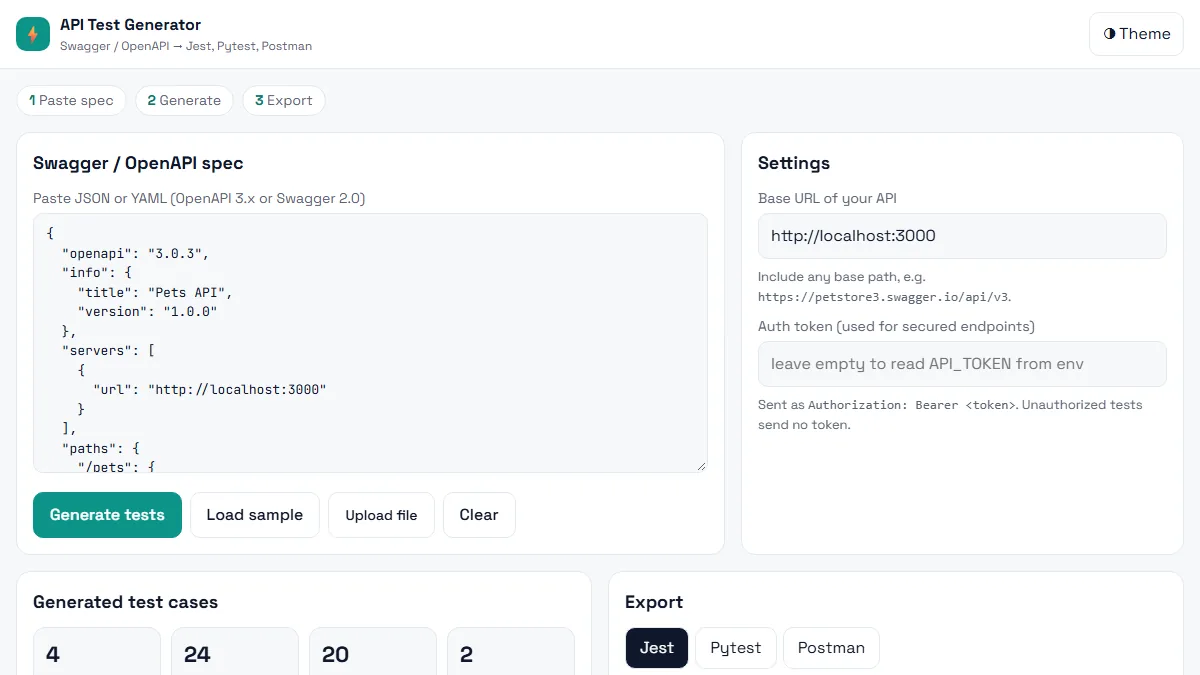
Tested 18 Nov 2026Automated tests: 24 passed
Free ZIP, 0.05 MB18 files, no keys inside
ai-api-test-generator-swagger-project-source-code.zip0.05 MB · 18 files · clean code, no keys inside · .env.example included
01What you will build and learn
The AI API Test Generator is a one-file web app that reads a Swagger / OpenAPI spec (JSON or YAML) and generates positive, missing-field, wrong-type, boundary, unauthorized and not-found test cases for every endpoint. You export them as Jest + Supertest, Pytest + requests or a Postman collection. It is a beginner-friendly API testing project for QA students and developers.
You will build
- A responsive single-page app that accepts OpenAPI 3.x or Swagger 2.0 as JSON or YAML (paste, upload or sample)
- A $ref resolver and a sample-data builder that turn schemas into valid requests
- A rule-based generator for 6 test types: Positive, Missing required, Wrong type, Boundary, Unauthorized, Not found
- Exporters for Jest + Supertest, Pytest + requests and Postman Collection v2.1, with Copy and Download
- Filter chips, endpoint search, summary cards and a light/dark theme
- A small mock Pets API to run the generated tests against (24/24 pass in every format)
Skills you practise
- Reading Swagger / OpenAPI specs: paths, parameters, request bodies, responses and security
- Designing negative and boundary API test cases from a schema
- Writing API tests with Jest + Supertest, Pytest + requests and Postman / Newman
- Playwright API testing with the request fixture
- Recursive JSON processing ($ref resolution with a depth guard)
- Responsive, accessible front-end with CSS variables and dark mode
Before you start
- Basic HTML, CSS and JavaScript (functions, arrays, objects)
- What a REST API is: methods, status codes, JSON
- A modern browser; Node.js 18+ (and optionally Python 3.9+) only to run the generated tests
- Software testing basics: test case, expected result, positive vs negative testing
Live demo in HTML, CSS and JavaScript
02Mini API test generator — try it in your browser
Edit the small OpenAPI JSON (or keep the sample) and press Generate tests. The demo builds positive, missing-required, wrong-type, boundary, unauthorized and not-found cases as a table, plus Playwright API test code. It is a simplified browser version of the full project, which also reads YAML and Swagger 2.0 and exports Jest, Pytest and Postman.
Result
Edit any tab and press Run. This is a simplified browser version of the project for learning; the full project is in the ZIP.
How the demo works
- JSON.parse reads the spec; a missing paths object shows an error instead of crashing.
- res() follows local $ref pointers such as #/components/schemas/NewPet so the body schema is complete.
- val() builds one valid value per field (enum first value, minimum for numbers, "sample" for strings), giving a valid request per endpoint.
- Each rule copies that valid request and breaks exactly one thing: removes a required field, sends the wrong type, crosses a min/max, drops the token or uses an unknown ID.
- The cases are drawn as a table and turned into Playwright request tests (request.get / request.post plus expect(res.status())).
03Project overview
The AI API Test Generator is a responsive web application that reads a Swagger / OpenAPI specification and automatically generates API test cases, exportable as Jest + Supertest, Pytest + requests or a Postman Collection v2.1.
Modern backends expose dozens of REST endpoints, and each needs positive, negative and boundary tests. Writing them by hand is slow and repetitive. Every endpoint is already described in the Swagger (OpenAPI) file, so those tests can be derived from it automatically. This project does exactly that, in the browser, with no installation: the whole app is one HTML file.
Who is this for? Beginners learning API testing, QA engineers who want a quick starting point, and developers who want to turn a spec into test scaffolding without writing boilerplate.
04Problem statement and objectives
The problem
- Manual API test writing takes a lot of time and is often incomplete.
- Negative and edge cases are commonly forgotten.
- Teams use different tools (Jest, Pytest, Postman), so tests must be portable.
Objectives
- Accept an OpenAPI 3.x or Swagger 2.0 spec as JSON or YAML (paste, upload or built-in sample).
- Parse endpoints, parameters, request bodies, responses and security rules.
- Generate smart test cases per endpoint.
- Export to multiple formats, and work on mobile, tablet and laptop.
05Key features
- Two input modes: paste JSON/YAML directly or upload a file from disk; a built-in sample spec for a quick start.
- Endpoint summary: number of endpoints, tests, negative tests and secured endpoints.
- Six test types: Positive, Missing required field, Wrong data type, Boundary, Unauthorized, Not found.
- Filter and search: chip filters by test type and a search box by endpoint.
- Three export formats: Jest + Supertest, Pytest + requests, Postman Collection v2.1, with Copy and Download.
- Light and dark theme: follows your OS by default, with a toggle to override.
- Fully offline logic: all parsing, generation and export happens in the browser tab. Your spec never leaves your machine.
06Architecture and flow
From the moment you paste a spec to the moment you download test code, the data passes through clear stages:
- Input
The user pastes, uploads or loads a sample spec.
- Parse
The text is parsed as JSON, falling back to YAML.
- Resolve
Local
$refpointers are expanded, with a depth limit to avoid infinite loops. - Analyse
Every path and HTTP method is read: parameters, body schema, required fields, security and success status.
- Generate
Rules create the test cases (see the rules table below).
- Render and export
Cases are shown in a filterable list and converted into the chosen format, which the user copies or downloads.
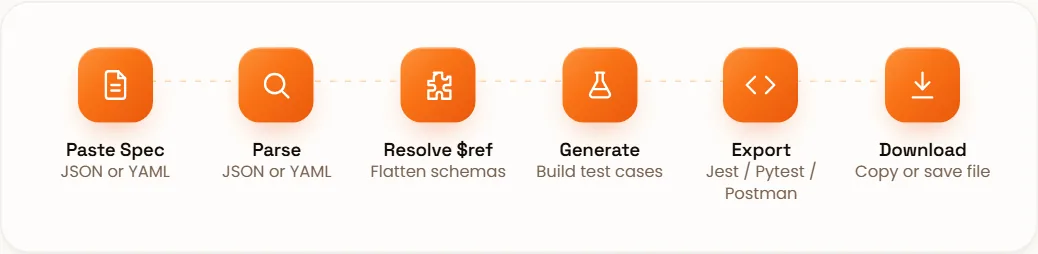
Inside the browser the app behaves like a small pipeline. Each stage is one function:
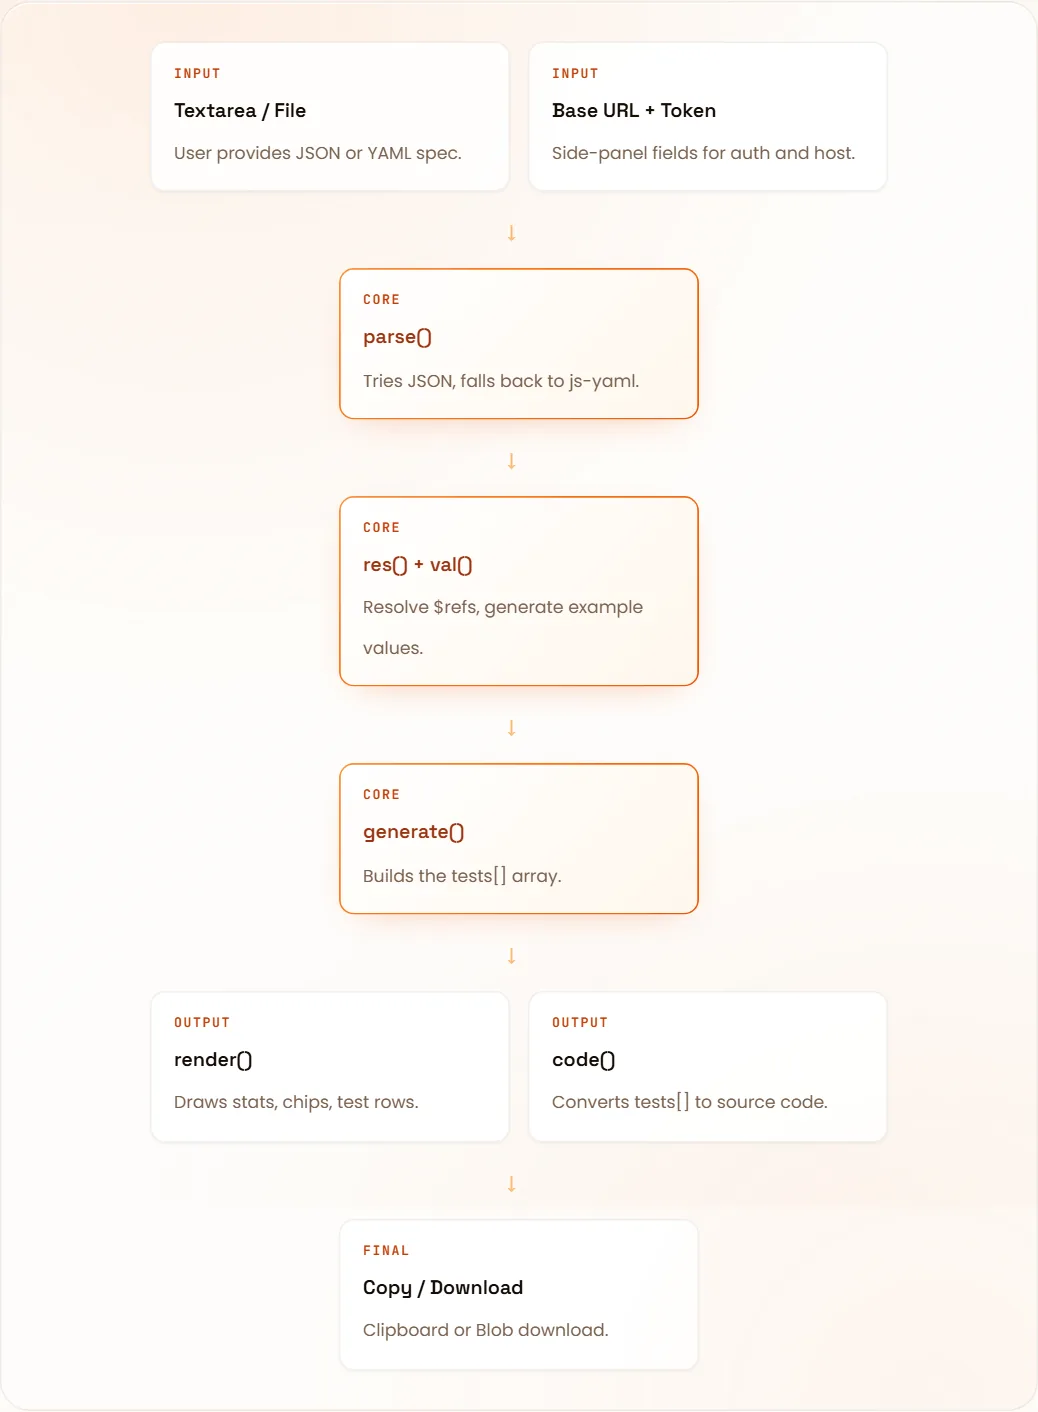
Key idea: everything is a pure function of the spec object and the current settings. No hidden state, no server calls, no surprises.
07Technology stack
| Layer | Technology | Why |
|---|---|---|
| Structure | HTML5 | Semantic, accessible markup |
| Styling | CSS3 (Grid, Flexbox, media queries, CSS variables) | Theme tokens for light/dark; no framework needed |
| Logic | Vanilla JavaScript (ES6+) | Zero framework, zero build step |
| YAML parsing | js-yaml (CDN, plus a local copy) | Converts YAML specs into JS objects |
| Input standard | OpenAPI 3.x / Swagger 2.0 | The common way to describe REST APIs |
| Generated tests | Jest + Supertest, Pytest + requests, Postman v2.1 | Portable across JS, Python and GUI teams |
08Folder structure
The app itself is one self-contained HTML file. The download adds a mock server, sample specs and ready-made example tests so you can run everything end to end.
ai-api-test-generator-swagger-project/
├── index.html               # the whole app: <style> + markup + <script>
│   ├── <head>   meta, Google Fonts, js-yaml (CDN, falls back to vendor/)
│   ├── <body>   header + theme toggle, step ribbon, spec card + settings,
│   │            results grid (summary, chips, test list) + export panel
│   └── <script> SAMPLE spec, state, parse/res/val, generate(),
│                jestCode/pytestCode/postmanCode, render(), event listeners
├── vendor/js-yaml.min.js    # offline YAML parser (MIT)
├── samples/                 # pets-api.json/.yaml + Swagger Petstore (OpenAPI 3 and Swagger 2)
├── mock-server/server.js    # Pets API to run the generated tests against
├── examples/                # generated tests: jest/, pytest/, postman/, playwright/
├── browser-demo/index.html  # mini one-file version (same as the live demo on this page)
├── package.json             # npm run mock | test:jest | test:playwright | test:postman
├── playwright.config.js
├── requirements.txt         # pytest + requests
└── README.md09Step 1: Plan, layout and responsive CSS
- Plan
Decide the inputs (the spec), the outputs (test code) and the test types to support.
- Layout
Build the HTML skeleton: header, input panel, settings panel (base URL + token), summary cards, test list and code output.
- Responsive CSS
Mobile first: one column on phones, two-column summary cards from 640px, and input and results side by side from 1024px. Colours are CSS variables, so dark mode only redefines the variables.
The app keeps all its state in a few small variables. That is the entire "database" of the app:
let spec = null;      // The parsed OpenAPI object
let tests = [];       // Every generated test case lives here
let filter = "All";   // Active filter chip (default: show everything)
let fmt = "Jest";     // Active export format

const TYPES = ["All", "Positive", "Missing required", "Wrong type",
"Boundary", "Unauthorized", "Not found"];10Step 2: Parse the spec (JSON or YAML)
The app supports both formats. It first tries JSON.parse(); if that fails it falls back to jsyaml.load(). Invalid text shows a clear error message, and a document without a paths object is rejected with a friendly hint.
function parse(t) {
  try {
    // Try JSON first — fastest path
    return JSON.parse(t);
  } catch (e) {
    // Not JSON — assume YAML
    return jsyaml.load(t);
  }
}11Step 3: Resolve $ref references
OpenAPI files use $ref to reuse schemas, for example {"$ref": "#/components/schemas/Pet"} (or #/definitions/Pet in Swagger 2.0). res() follows that pointer and returns the real schema. The d parameter is a depth guard so circular schemas cannot loop forever.
function res(s, d = 0) {
  // Safety: stop deep / invalid recursion
  if (!s || typeof s !== "object" || d > 6) return s || {};

  if (s.$ref) {
    // Split "#/components/schemas/Pet" into ["components","schemas","Pet"]
    const p = s.$ref.replace(/^#\//, "").split("/");
    let n = spec;
    for (const k of p) n = n && n[k];
    return res(n || {}, d + 1);
  }

  // Recursively resolve nested object properties
  const o = { ...s };
  if (o.properties) {
    o.properties = {};
    for (const k in s.properties)
      o.properties[k] = res(s.properties[k], d + 1);
  }
  if (o.items) o.items = res(o.items, d + 1);
  return o;
}12Step 4: Build valid sample values
val() creates a realistic example for any schema. It respects example, enum, type, format (email, uuid; the download also handles date and date-time), minimum and minLength, and builds arrays and nested objects.
function val(s, d = 0) {
  s = res(s);                  // resolve $ref first
  if (d > 5) return null;
  if (s.example !== undefined) return s.example;
  if (s.enum) return s.enum[0];

  switch (s.type) {
    case "integer": return s.minimum ?? 1;
    case "number":  return s.minimum ?? 1.5;
    case "boolean": return true;
    case "array":   return [val(s.items || {}, d + 1)];
    case "object":
    case undefined: {
      if (!s.properties) return s.type ? {} : "sample";
      const o = {};
      for (const k in s.properties)
        o[k] = val(s.properties[k], d + 1);
      return o;
    }
    default:
      // string formatting shortcuts
      if (s.format === "email") return "user@example.com";
      if (s.format === "uuid")  return "123e4567-e89b-12d3-a456-426614174000";
      let v = "sample";
      if (s.minLength && v.length < s.minLength)
        v = v.padEnd(s.minLength, "x");
      return v;
  }
}
Meet the Software Testing & Playwright trainers
Stuck on a step of this project? These are the Uncodemy trainers who teach these skills in live classes. Book a free demo class and ask them your doubts directly.
 Mr. Chandra ShekharCorporate Trainer at Coforge · 6+ years
Software testing trainer who works as a Corporate Trainer at Coforge, where he earlier built Selenium-Java automation frameworks and did manual and functional testing. He teaches manual, API and automation testing with Selenium and Java.
Manual TestingAPI TestingAutomation TestingSelenium WebDriver Mr. Rishi RajAutomation Tester & Corporate Trainer at Cognizant · 5+ years
Automation tester and corporate trainer at Cognizant who teaches manual, API and automation testing with Selenium, Playwright and Cypress. He has built automated test suites integrated with CI/CD pipelines and focuses on hands-on, industry-ready practice.
Selenium WebDriverPlaywrightCypressTestNG Mr. Ravi PrakashSenior QA Engineer at Wipro · 5+ years
ISTQB-certified Senior QA Engineer at Wipro with experience in web and mobile testing using Java, Maven, TestNG and Robot Framework. As a trainer he aims to make tricky testing topics simple and easy to follow.
Selenium WebDriverPlaywrightJavaTestNG Mr. RatanQA Automation Trainee at Wipro · 7+ months
QA automation trainee at Wipro with hands-on experience in manual and automated testing using Selenium, Playwright and API testing. He started as a QA intern at Uncodemy and teaches testing in simple, practical lessons.
Selenium WebDriverPlaywrightAPI TestingPyTest13Step 5: Generate the test cases
generate() is the heart of the app. For each endpoint it first builds one valid request, then mutates a copy of it to create each negative case.
for (const path in spec.paths || {}) {
  const item = spec.paths[path];
  for (const method of ["get", "post", "put", "patch", "delete"]) {
    const op = item[method];
    if (!op) continue;
    eps++;

    // Gather parameters (path-level + operation-level)
    const ps = [...(item.parameters || []), ...(op.parameters || [])].map((p) => res(p));

    // Does this endpoint require auth?
    const sec = (op.security ?? spec.security ?? []).length > 0;

    // Find the success status (2xx)
    const ok = Object.keys(op.responses || {}).find((c) => /^2/.test(c)) || "200";

    // Build path + query values for the "valid" request
    const pathV = {}, qv = {};
    ps.forEach((p) => {
      const s = p.schema || p;
      if (p.in === "path") pathV[p.name] = val(s);
      if (p.in === "query" && p.required) qv[p.name] = val(s);
    });
    // ...request body, then the test rules below
  }
}
Test generation rules
| Type | How it is created | Expected result |
|---|---|---|
| Positive | All required inputs valid | Success status from the spec (200/201/204) |
| Missing required | Remove one required query parameter or body field | 400 |
| Wrong data type | Send a string where a number is expected (and the reverse) | 400 |
| Boundary | Go beyond minimum, maximum, minLength or maxLength | 400 |
| Unauthorized | Endpoint has security defined but no token is sent | 401 |
| Not found | Use a non-existing ID in the path | 404 |
Each rule is a few lines using a small add() helper that clones the valid request, applies one change and pushes the result into tests[]:
// add(): clone the valid request, apply one change, push into tests[]
const add = (type, desc, change, expect) => {
  const req = clone(base);
  if (change) change(req);
  tests.push({ id: ++n, type, desc, name, expect: Number(expect), ...req });
};

// 1. Positive — all required inputs valid
add("Positive", `${name} - valid request`, null, ok);

// 2. Missing required — drop one required query param or body field
ps.filter((p) => p.in === "query" && p.required).forEach((p) =>
  add("Missing required", `missing required query "${p.name}"`,
      (r) => { delete r.query[p.name]; }, 400));
(bs.required || []).forEach((f) =>
  add("Missing required", `missing required field "${f}"`,
      (r) => { delete r.body[f]; }, 400));

// 3. Wrong type — "abc" where a number is expected, 12345 where a string is expected
if (numF) add("Wrong type", `string sent for number ${label(numF)}`, (r) => setField(r, numF, "abc"), 400);
if (strF) add("Wrong type", `number sent for string ${label(strF)}`, (r) => setField(r, strF, 12345), 400);

// 4. Boundary — one step beyond minimum / maximum / minLength / maxLength
fields.forEach((f) => {
  const s = f.s || {};
  if (isNum(s) && s.minimum !== undefined)
    add("Boundary", `${label(f)} below minimum (${s.minimum})`, (r) => setField(r, f, s.minimum - 1), 400);
  if (isNum(s) && s.maximum !== undefined)
    add("Boundary", `${label(f)} above maximum (${s.maximum})`, (r) => setField(r, f, s.maximum + 1), 400);
  // ...same idea for minLength / maxLength
});

// 5. Unauthorized — security defined but no token sent
if (sec) add("Unauthorized", "no auth token sent", (r) => { r.auth = false; }, 401);

// 6. Not found — a non-existing ID in the path (99999999, or a dummy uuid/string)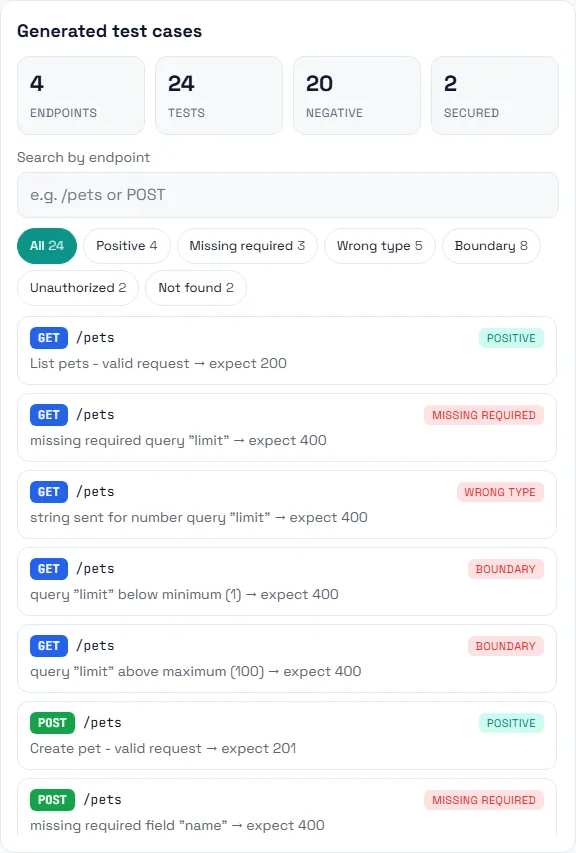
14Step 6: Export to Jest, Pytest and Postman
The same tests[] array is converted into three text formats. The Base URL and token from the settings panel become defaults, and can be overridden with the BASE_URL and API_TOKEN environment variables.
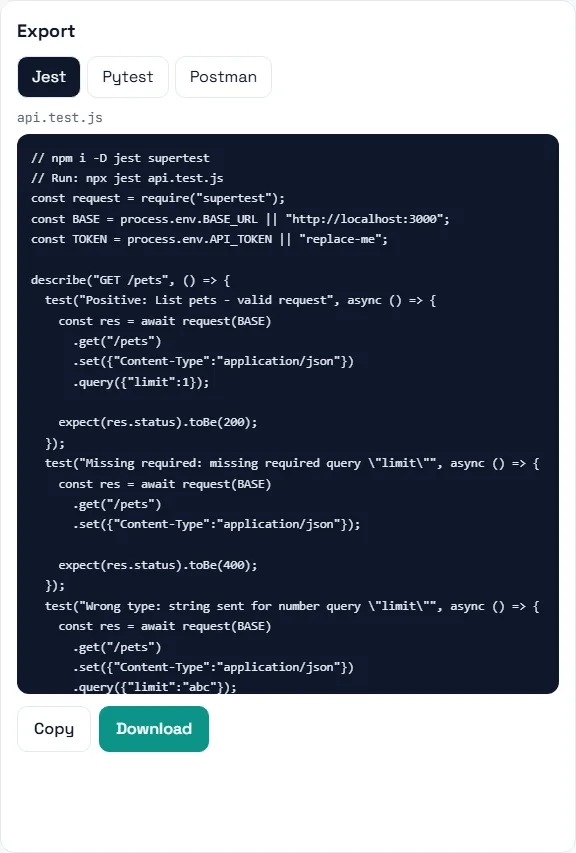
Jest + Supertest
// npm i -D jest supertest
const request = require("supertest");
const BASE = process.env.BASE_URL || "http://localhost:3000";
const TOKEN = process.env.API_TOKEN || "replace-me";

describe("POST /pets", () => {
  test("Positive: Create pet - valid request", async () => {
    const res = await request(BASE)
      .post("/pets")
      .set({"Content-Type":"application/json", "Authorization": `Bearer ${TOKEN}`})
      .send({"name":"sample","type":"dog","age":0});

    expect(res.status).toBe(201);
  });
  test("Unauthorized: no auth token sent", async () => {
    const res = await request(BASE)
      .post("/pets")
      .set({"Content-Type":"application/json"})
      .send({"name":"sample","type":"dog","age":0});

    expect(res.status).toBe(401);
  });
});
Pytest + requests
A shared headers(auth) helper adds the Bearer token only where needed:
def test_2_get_missing_required_missing_required_query_limit():
    """GET /pets | Missing required: missing required query 'limit'"""
    response = requests.request("GET", BASE + "/pets", headers=headers(False), timeout=10)
    assert response.status_code == 400
Postman Collection v2.1
Each test becomes a request with {{baseUrl}} and {{token}} variables and a test script pm.response.to.have.status(...), so you can run it in Postman or with Newman.
15Step 7: Render the UI and wire the buttons
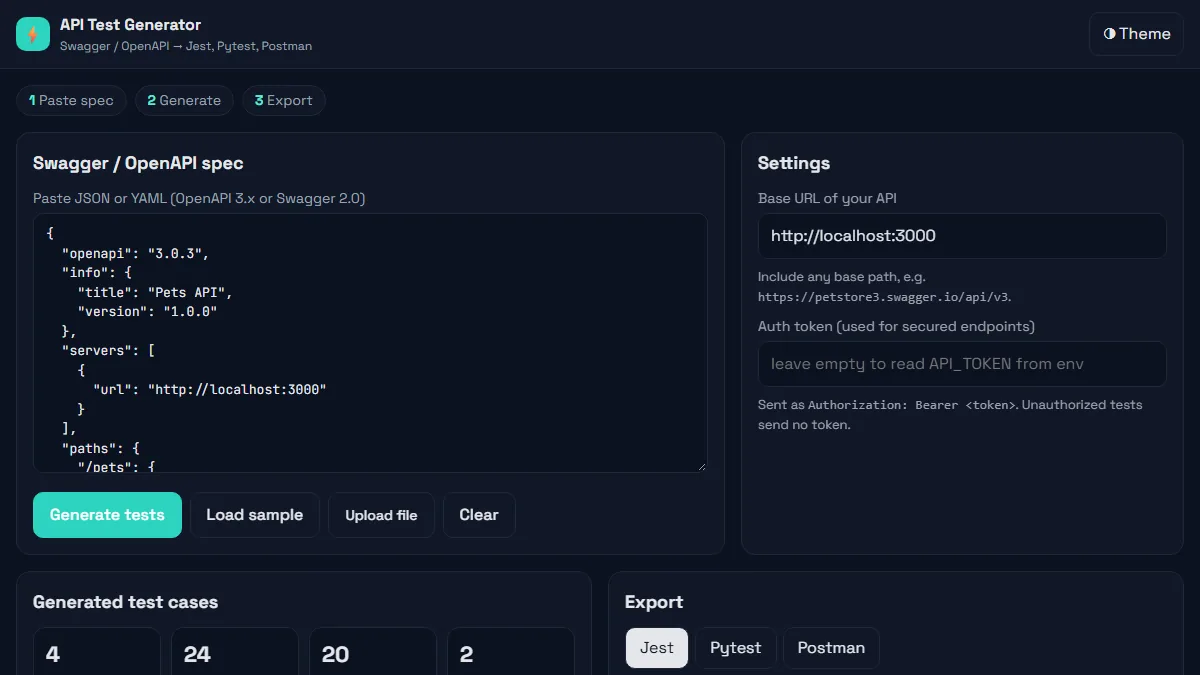
render() redraws the summary, chips, test rows and the code panel. It is called whenever the spec, filter, search or format changes. Text from the spec is HTML-escaped before it goes into the page.
function render() {
  // 1. Filter chips (one button per test type, with counts)
  TYPES.forEach((t) => { /* build chip button + click handler */ });

  // 2. Test list (filter chip + endpoint search)
  const f = tests.filter((t) => (filter === "All" || t.type === filter) &&
    (!query || `${t.method} ${t.path}`.toLowerCase().includes(query.toLowerCase())));
  // ...render each row with method badge, path, tag, description (HTML-escaped)

  // 3. Code panel
  $("out").textContent = code();
}
The theme follows the OS by default. Clicking the toggle sets a data-theme attribute that overrides it (the download also remembers the choice in localStorage):
$("theme").addEventListener("click", () => {
  const root = document.documentElement;
  const prefersDark = window.matchMedia &&
    window.matchMedia("(prefers-color-scheme: dark)").matches;

  // If a manual theme is set, use that. Otherwise use OS.
  const currentDark = root.dataset.theme ? root.dataset.theme === "dark" : prefersDark;
  root.dataset.theme = currentDark ? "light" : "dark";
});
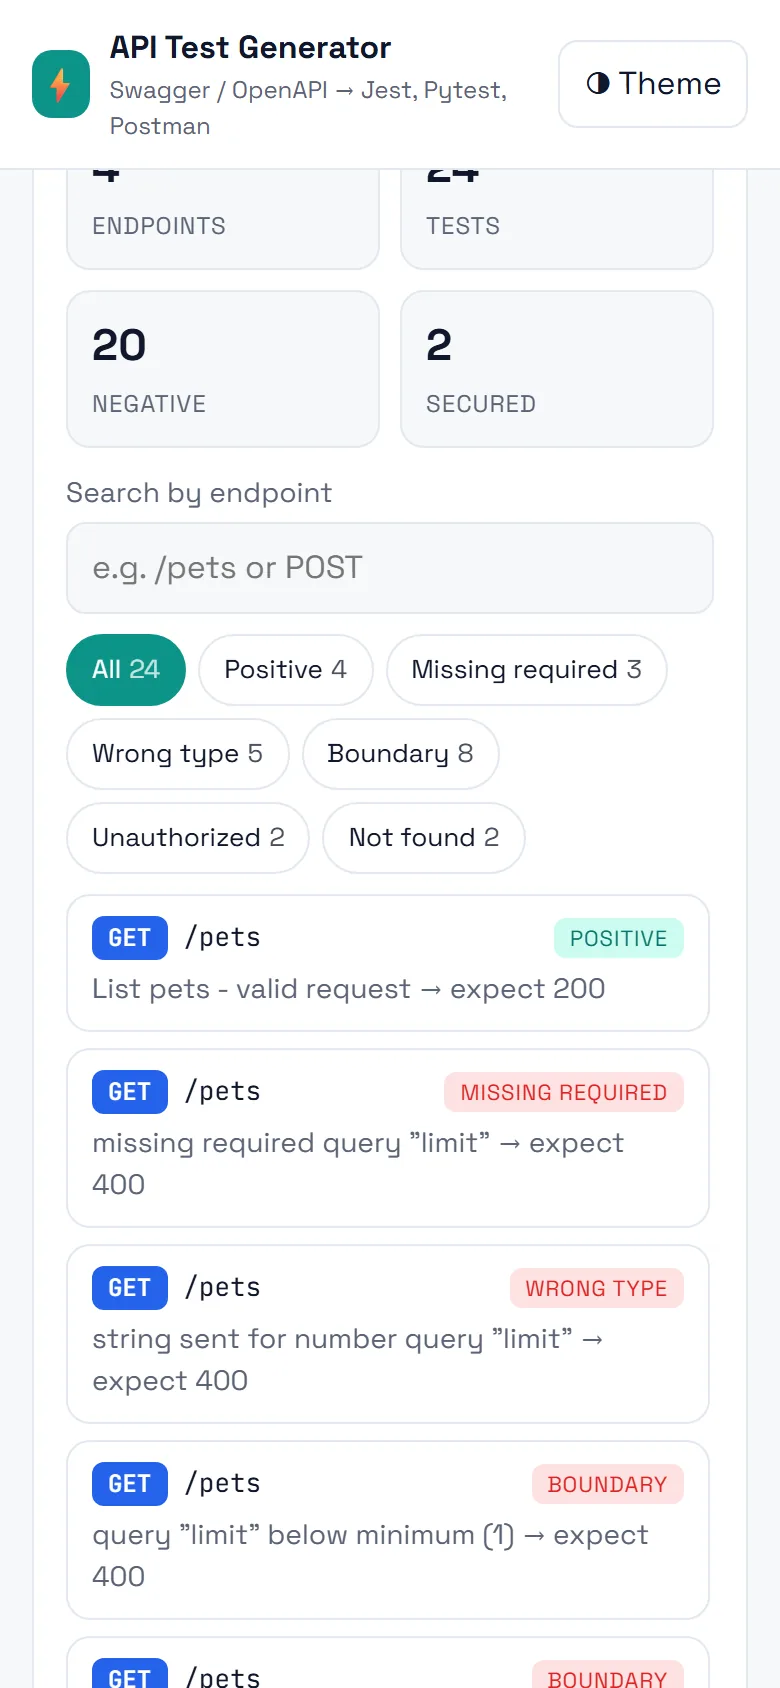
16Responsive design
- Mobile (below 640px): single column, large tap targets (44px), horizontally scrollable code blocks.
- Tablet (640–1023px): four summary cards in a row, stacked panels.
- Laptop (1024px and above): input and settings side by side, test list and export side by side.
17Testing the project
The documentation's test plan, and what we actually ran on the download:
- Load the sample spec
Tests appear for every endpoint: 4 endpoints, 24 tests.
- Invalid input
Broken YAML and a JSON object without
pathsboth show a friendly error. - JSON, YAML and Swagger 2.0
The public Swagger Petstore spec gives 19 endpoints / 59 tests as OpenAPI 3 JSON and the same as YAML; the Swagger 2.0 Petstore gives 20 endpoints / 65 tests.
- Screen sizes
390px, 800px and 1280px wide, no horizontal scroll.
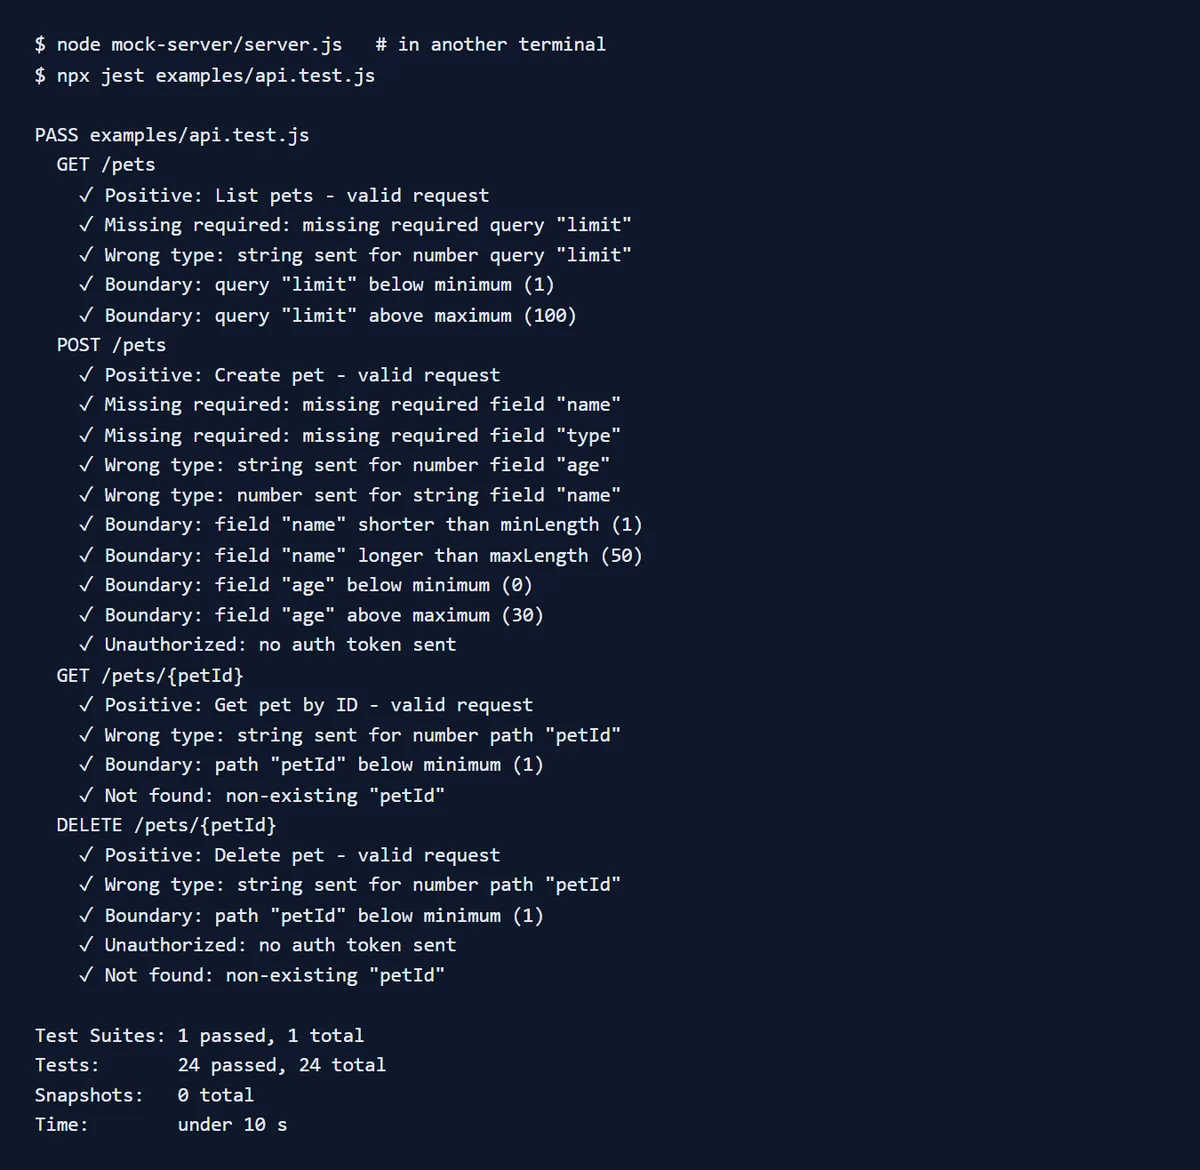
- Run the exported tests against a mock server
mock-server/server.jsimplements the sample Pets API. All exported formats pass against it.
18Customization guide
- Accent colour: change
--accentin the:rootblock of the<style>tag. - Default base URL: change the
valueof<input id="base">. - New export format: add the name to
FMTS, a filename toFILE_MAPand a new branch incode(). - Sample spec: replace the
SAMPLEconstant to change what Load sample loads. - 422 instead of 400: some APIs return 422 for validation errors; change the
400values ingenerate(). - More test cases: add a block in
generate()using theadd()helper.
19Limitations and future enhancements
Limitations
- Expected status codes are standard assumptions (400, 401, 404); real APIs may differ, so review before running.
- Only local
$refis supported, not remote files.allOf/oneOfschemas are not merged. - Auth is assumed to be a Bearer token.
- Rule-based generation; the page itself makes no live API calls.
Future enhancements
- AI layer: send the spec to an LLM from a Node.js/Express backend to suggest business-logic tests, realistic data and test descriptions.
- Save projects in MongoDB with user login (a full MERN version).
- Run the tests directly from the page and show pass/fail reports.
- More export formats: Playwright, Cypress, RestAssured, k6, cURL.
20Beginner glossary
| Term | Meaning |
|---|---|
| Swagger / OpenAPI | A standard way to describe a REST API, usually written as JSON or YAML. |
| Endpoint | A URL + HTTP method combination, e.g. GET /pets. |
| Path parameter | Part of the URL, like /pets/{id}. |
| Query parameter | Data after ?, e.g. /pets?limit=10. |
| Request body | Data sent with POST/PUT/PATCH requests, usually JSON. |
| Schema | A description of what data looks like (types, ranges, required fields). |
| $ref | A pointer to a schema defined elsewhere in the file. |
| Bearer token | A string sent in the Authorization header for protected endpoints. |
21How to run the source code
Download the ZIP above, unzip it and follow these steps in a terminal inside the project folder.
- 1Unzip and open the folder
cd ai-api-test-generator-swagger-projectThe app is index.html, so no build step is needed.
- 2Open the generator
start index.htmlOr double-click it (macOS: open index.html). Click Load sample, then Generate tests.
- 3Install test tools
npm installInstalls jest, supertest, @playwright/test and newman for the examples.
- 4Start the mock Pets API
npm run mockKeep it running in its own terminal: http://localhost:3000
- 5Run the Jest tests
npm run test:jest24 tests from examples/jest/api.test.js
- 6Run the Playwright API tests
npm run test:playwright16 tests; API tests need no browser download.
- 7Run the Postman collection
npm run test:postmanNewman runs 24 requests with status assertions.
- 8Run the Pytest tests
pip install -r requirements.txt && pytest -v examples/pytestUse a virtual environment if you like. 24 tests.
Runs, with notes · checked 2026-11-18 on Node 22.23 / npm 10.5 / Python 3.12.5 / Chromium via Playwright on Windows 11
- Generator in headless Chromium: sample spec 4 endpoints / 24 tests; Petstore OpenAPI 3 (JSON and YAML) 59 tests; Petstore Swagger 2.0 65 tests; no page errors
- Offline check (all network blocked): YAML parser loaded from vendor/, same results
- npm run test:jest against mock server: 24 passed
- npm run test:playwright (browser demo output): 16 passed
- npm run test:postman (Newman): 24 requests, 24 assertions, 0 failed
- pytest examples/pytest: 24 passed
- Live demo in sandboxed iframe at 1100px and 360px: 16 cases, no console errors, no network calls
The original bundle had documentation only, with the key functions printed in it. Uncodemy completed the rest of the app, the exporters and the mock server from the documented rules, then tested the ZIP from a clean unzip. Negative-test status codes are assumptions; review them for a real API.
22Troubleshooting
I clicked Generate tests but nothing happened
Read the red message under the buttons. The usual cause is a missing paths object, which means the text is not a valid OpenAPI/Swagger document.
YAML is not parsing correctly
Use 2-space indentation and no tabs. If unsure, convert the YAML to JSON first, because JSON errors are easier to spot. Offline, make sure vendor/js-yaml.min.js is next to index.html.
My API returns 422, not 400, for missing fields
Some APIs use 422 Unprocessable Entity. Change the 400 values for the negative tests in generate(), or edit the expected status in the exported file.
All secured tests fail with 401
Set a real token: type it in the Auth token field before exporting, or run with API_TOKEN=your-token. For API-key or OAuth2 specs, edit the Authorization header in the exported code.
ECONNREFUSED / connection refused when running tests
The API is not running at BASE_URL. Start the mock with npm run mock, or set BASE_URL to your API (include any base path such as /api/v3).
Port 3000 is already in use
Start the mock on another port (PORT=3100 npm run mock; PowerShell: $env:PORT=3100; npm run mock) and run the tests with the same BASE_URL.
23Interview questions on this project
Practice questions an interviewer or viva examiner may ask about this project.
What is the difference between Swagger 2.0 and OpenAPI 3?
OpenAPI 3 is the newer version of the Swagger spec. It moves schemas to components/schemas (Swagger 2 uses definitions), replaces the in: body parameter with requestBody and content types, and replaces host/basePath with a servers list.
Which negative tests would you write for a POST endpoint?
Missing each required field, wrong data types, values outside min/max or length limits, invalid enum values, missing or invalid auth (401/403), malformed JSON, and duplicates if the resource must be unique.
What is boundary value analysis in API testing?
Testing at and just beyond the limits of an input, for example limit = 0, 1, 100 and 101 when the allowed range is 1–100. Bugs often hide at the edges, so the generator sends minimum − 1 and maximum + 1 and expects 400.
Why can automatically generated tests not replace manual test design?
A spec describes structure, not business rules. Generated tests check validation, auth and status codes, but not logic like 'a cancelled order cannot be shipped'. Expected codes are also assumptions, so a tester must review them.
How do you resolve $ref safely when schemas can be circular?
Follow the JSON pointer path from the spec root, recurse into properties and items, and pass a depth counter that stops at a limit (6 here), so a schema that references itself cannot cause infinite recursion.
What is the difference between 401 and 403?
401 Unauthorized means the request has no valid credentials (not logged in). 403 Forbidden means the user is authenticated but not allowed to do this action.
How would you run these API tests in CI?
Start the API (or a mock) in the pipeline, set BASE_URL and API_TOKEN as secrets or variables, then run npx jest, npx playwright test, pytest or newman run with a JUnit reporter, and fail the build on any failed test.
Why is it useful to export the same tests to Jest, Pytest and Postman?
Teams use different stacks. One source of truth (the spec) generating tests for each tool keeps coverage consistent and avoids rewriting the same cases by hand.
24Put it on your resume
Resume points
- Built a browser-based API test generator that converts Swagger 2.0 / OpenAPI 3 specs (JSON or YAML) into Jest, Pytest and Postman test suites
- Implemented rule-based generation of 6 test types (positive, missing required, wrong type, boundary, unauthorized, not found) with a $ref resolver and schema-driven sample data
- Generated 59 tests from the public Swagger Petstore spec, and verified exported suites against a mock API (24/24 passing in Jest, Pytest, Newman)
- Designed a responsive, dark-mode-ready single-file UI with filtering, search, copy and download, and no backend
Ideas to extend it
- Add a Playwright export format to the full app, matching the browser demo
- Add response schema validation tests (compare the response body with the declared schema, e.g. with Ajv)
- Add a Run tests button that calls the API with fetch() and shows pass/fail, with CORS notes
- Support allOf / oneOf / anyOf schemas and remote $ref files
- Use an LLM from a small backend to suggest business-logic tests and realistic test data
- Export cURL commands and k6 load-test scripts
Uncodemy course
Turn this project into a job-ready skill
This project uses the core API testing skills taught in the Uncodemy Software Testing course: reading API specs, designing positive, negative and boundary test cases, status-code checks and Postman collections. The Playwright course covers the request fixture used in the demo's generated tests, plus test runners, reporting and running suites in CI, so you can extend this generator into a full automation framework.
- Duration4–5 months
- Training120+ hours
- Modules7 blocks
- ProjectsE-commerce suite, education app, API automation pack + CI capstone
What you learn in the Software Testing Course
- Fundamentals, SDLC & STLC
- Test Design Techniques (BVA, equivalence partitioning, decision tables)
- Testing Types (smoke, sanity, regression, UAT)
- SQL & Database Testing
- API Testing with Postman & REST Assured
- Core Java + Selenium WebDriver (POM, hybrid framework)
- TestNG & Maven
- Agile, JIRA & Jenkins CI
Uncodemy Certificate · Uncodemy Agile Certificate · Module Completion Certificate · Dedicated Placement Support · Classroom in Noida & Delhi or live online
Learn Software Testing with a free demo class
- See how the trainer explains a real project like this one
- Get your setup or code doubts cleared live
- Understand the course plan, batches and Dedicated Placement Support
“Joining Uncodemy was one of the best decisions of my career. The mentors provided great hands-on training and the placement team guided me through every step, helping me land my role as an Automation Test Engineer.”
Abhinav Pandey, DXC Technology
“Uncodemy played a key role in shaping my IT career. The practical training, real-world projects, and mentor support gave me the confidence to excel and secure my role as an Automation Tester.”
Sahil Siddique, Hewlett Packard Enterprise
“Uncodemy played a vital role in helping me build a strong foundation in automation testing. The mentors provided excellent guidance, and the practical sessions made complex topics easy to understand.”
Vivek Tripathi, Zensar Technologies
From Uncodemy learner stories. Individual results vary.
25Frequently asked questions
Do I need a backend or an API key to run this project?
No. The generator is one HTML file that runs fully in your browser. No AI or paid API is used. Node.js or Python is only needed if you want to run the generated tests.
Is my API spec uploaded anywhere?
No. Parsing, generation and export all happen in the browser tab. The only network requests are the js-yaml script and Google Fonts from CDNs, and the page falls back to a local js-yaml copy when offline.
Which spec formats are supported?
OpenAPI 3.x and Swagger 2.0, in JSON or YAML, pasted, uploaded or loaded from the sample. Only local $ref pointers are resolved.
Can I run the generated tests on my real API?
Yes. Set BASE_URL (and API_TOKEN for secured endpoints) and run them. Review the expected codes first, and do not run DELETE or PUT tests against production data.
Why is it called an AI test generator if it is rule-based?
The current version is rule-based and works offline. The documented next step is an AI layer: a Node.js backend that sends the spec to an LLM to suggest business-logic tests and realistic data.
Is this a good project for a QA or software testing resume?
Yes. It shows API testing knowledge (negative and boundary cases, status codes, auth), test automation in three tools and front-end skills, and you can explain every rule in an interview.
Are the generated tests real interview or production test cases?
They are practice test cases derived from the spec rules. Treat them as a starting point and add business-logic tests yourself.
More free projects
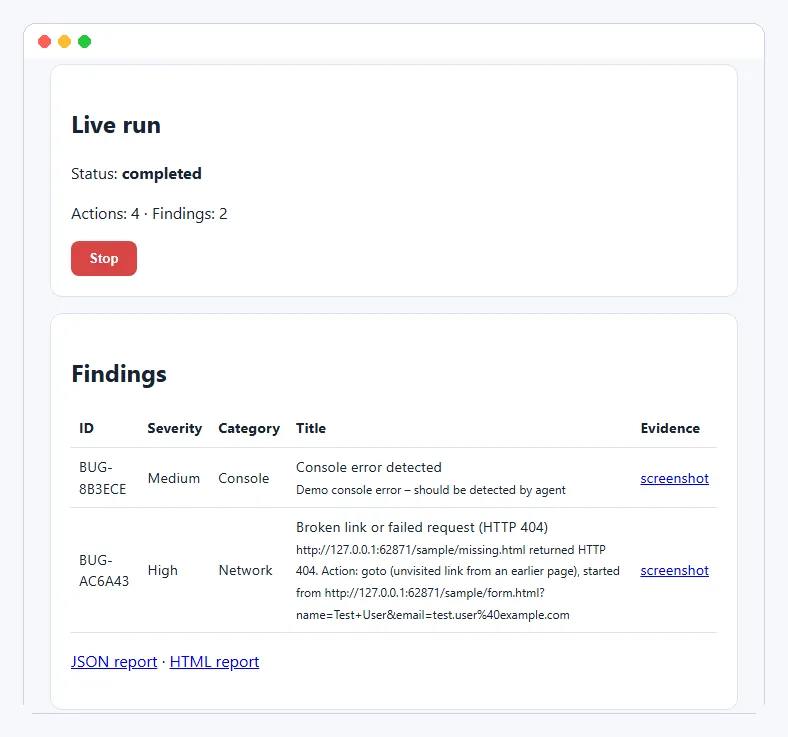 Testing · IntermediateAI Exploratory Testing Agent
A browser agent that explores your web app on its own, finds evidence-backed bugs and writes the report for you.
Python 3.11+ · Playwright (Chromium) · FastAPI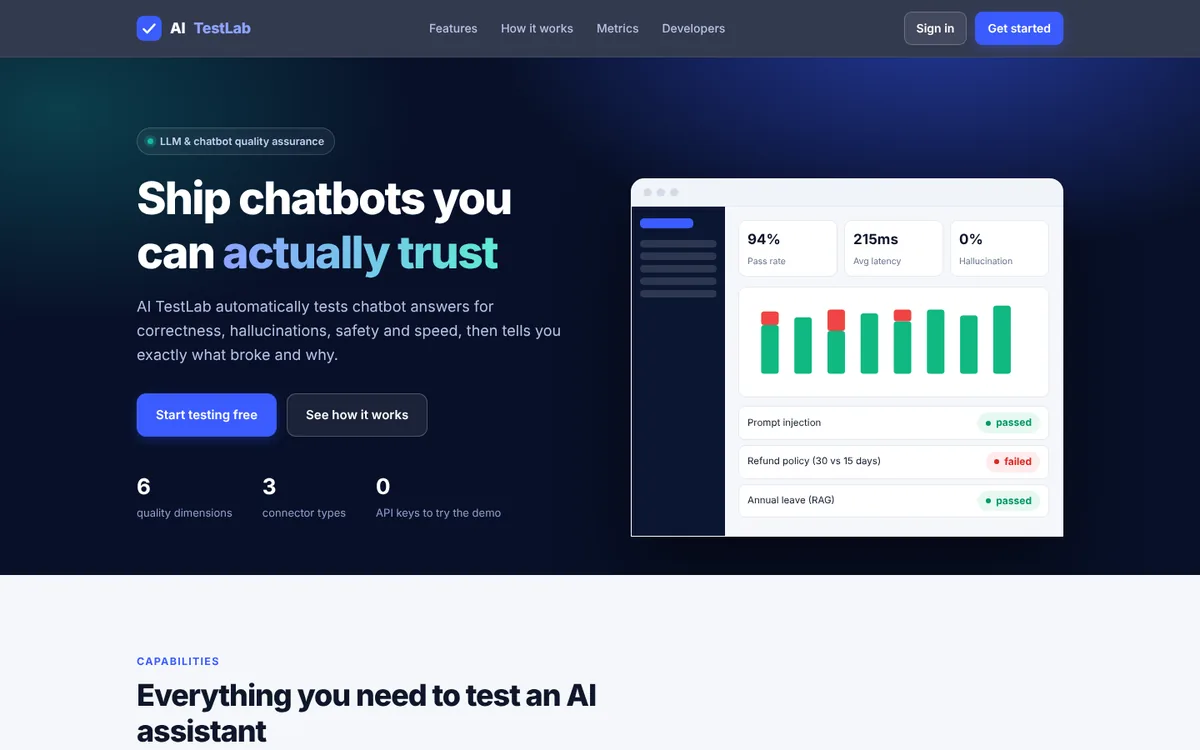 Testing · IntermediateAI TestLab
Automatically test chatbot answers for correctness, hallucinations, safety and speed – and catch regressions before users do.
Node.js 20+ · JavaScript · Node http server (no Express)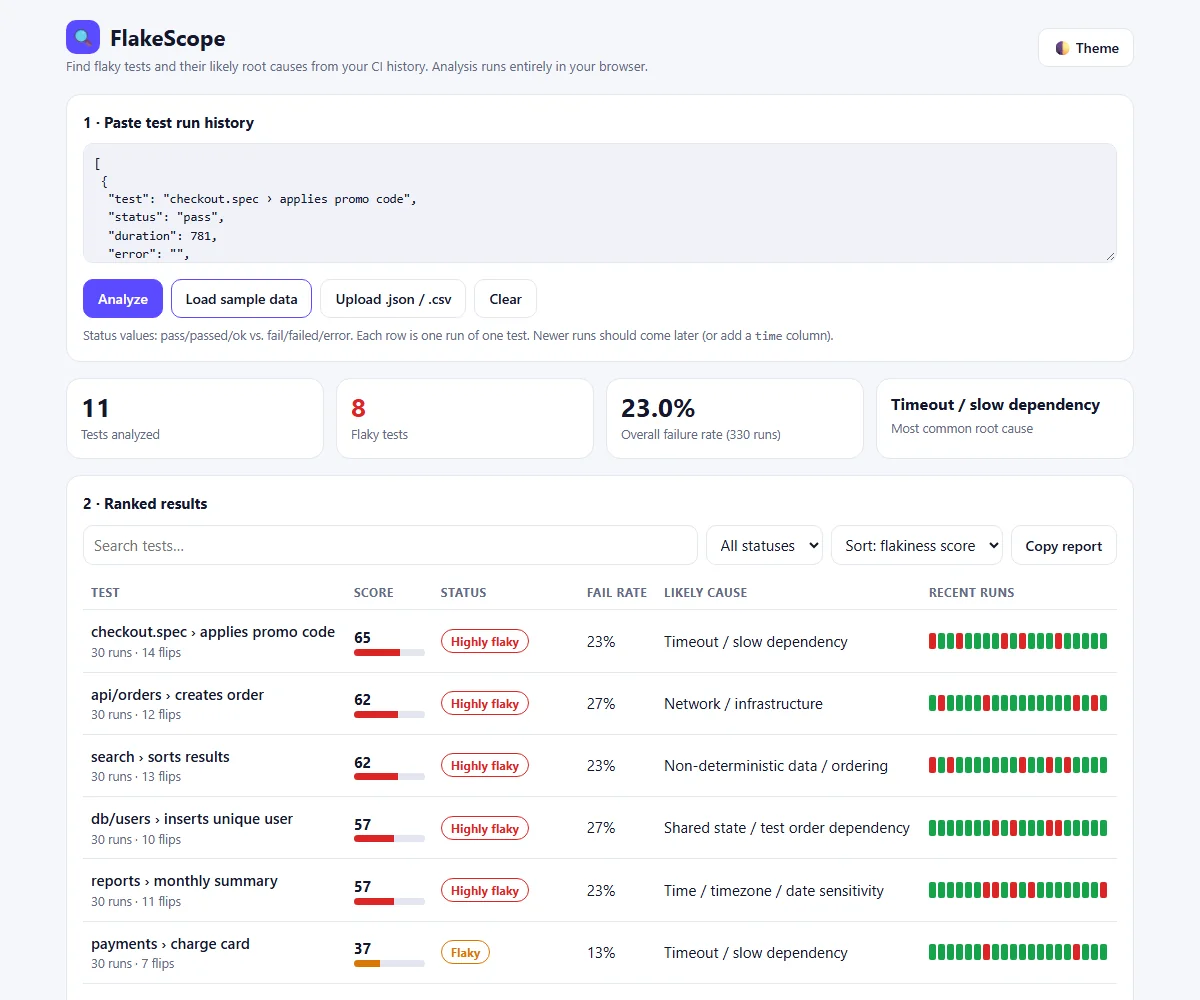 Testing · BeginnerFlakeScope – Flaky Test Root Cause Analyzer
Find which tests are flaky, why they fail and how to fix them, from your CI run history, right in the browser.
HTML · CSS · JavaScript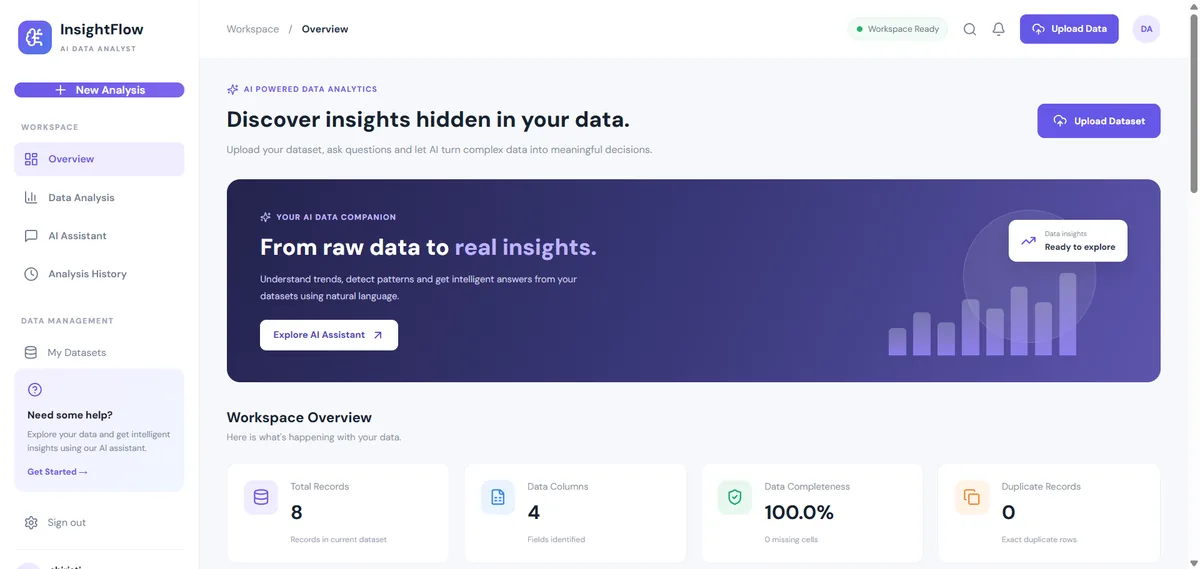 Data & AI · IntermediateAI Data Analyst Agent
Upload a CSV or Excel file, get an instant data-quality report and ask questions about your data. No API key needed.
React 18 · Vite · Node.js Data & AI · IntermediateAI Sales Forecasting Copilot
Forecast monthly sales you can actually explain — and ask questions answered only from your own data.
React · TypeScript · Vite Data & AI · AdvancedLoRA Studio
Upload a dataset, fine-tune a small open model with LoRA, watch the loss fall live and compare base vs fine-tuned answers.
React 18 · Vite · RechartsThis project is shared for learning. The code is provided as is; read it, run it and change it. Do not commit real API keys: use the .env.example file. Interview questions are practice questions, not a record of any company's interviews.